How do I edit existing pick-up/delivery locations?
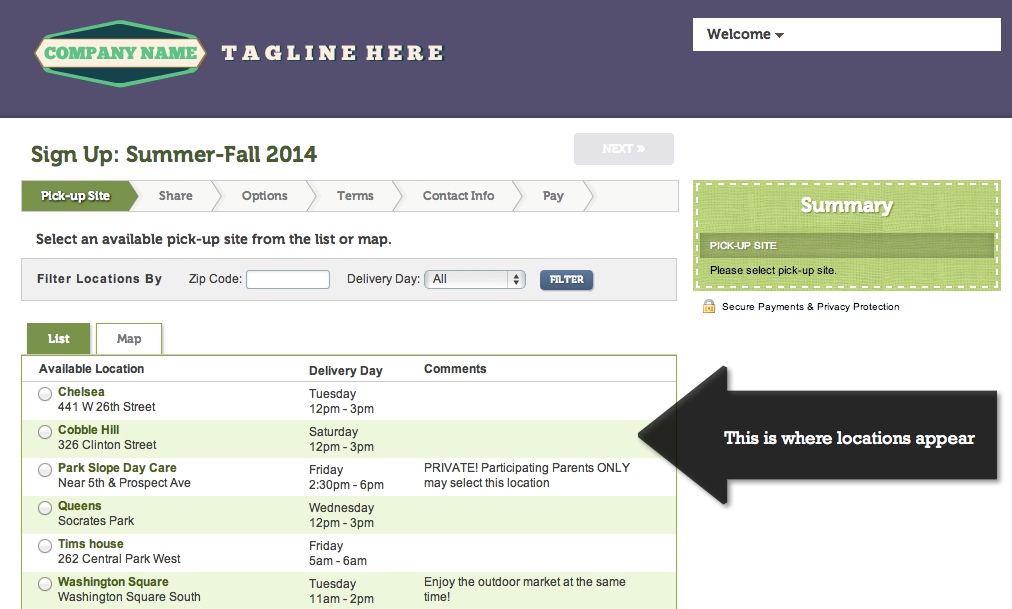
Learn how to create and edit the pick-up or delivery locations that are presented in the first step of your sign-up process.
Editable sections of your location include:
- General Settings (i.e. Address, Pick-up Type)
- Hosts
- Pick up Info
- Extra Fees
Steps to edit your locations:
1. Find the location you would like to edit:
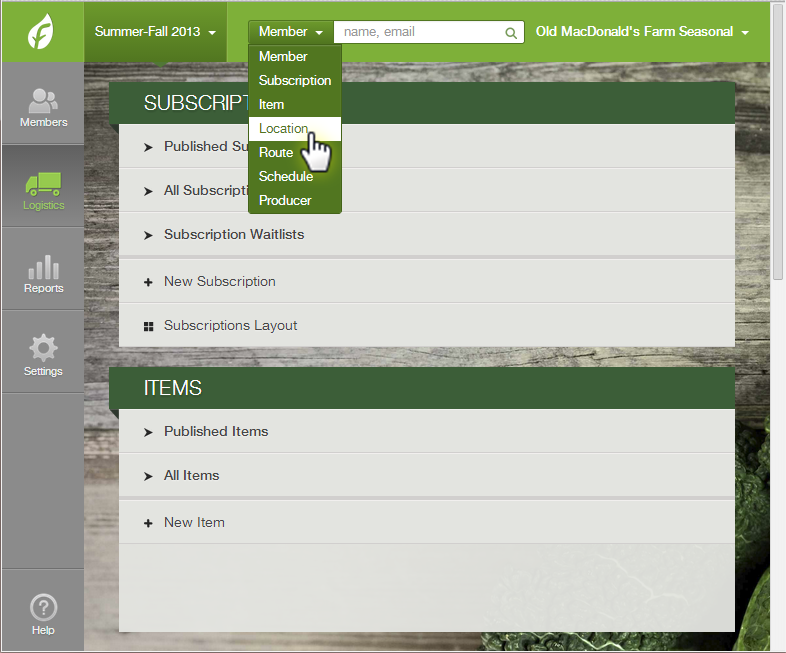
The first step to editing a location is to find the location that you would like to edit. There are a number of ways to get to the location in your dashboard. Here are the 2 primary ways to find the location that you wish to edit (click here to learn how to create a new location):
The first step to editing a location is to find the location that you would like to edit. There are a number of ways to get to the location in your dashboard. Here are the 2 primary ways to find the location that you wish to edit (click here to learn how to create a new location):
2. Edit the location
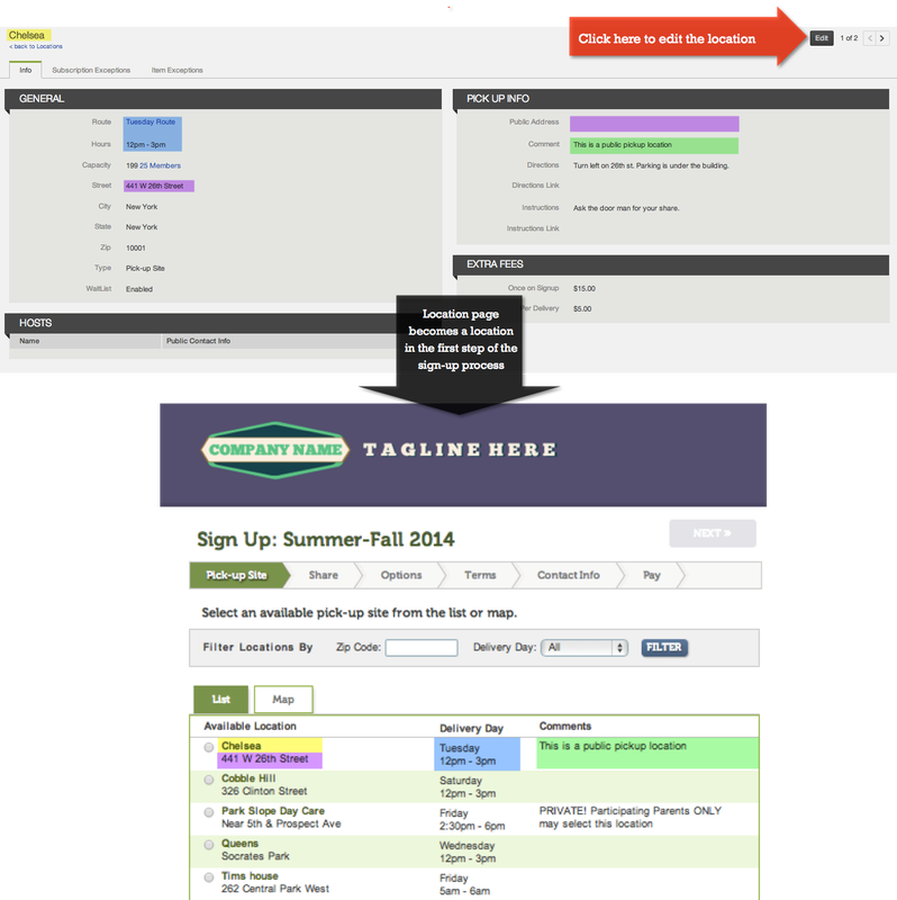
Once you have found the location that you wish to edit, click the edit button in the upper right corner. (Each field for a location is itemized below. Certain fields will also be displayed to the member. In order the location to be presented as an option to your members, the required fields marked with an asterisk (*) will need to be completed.
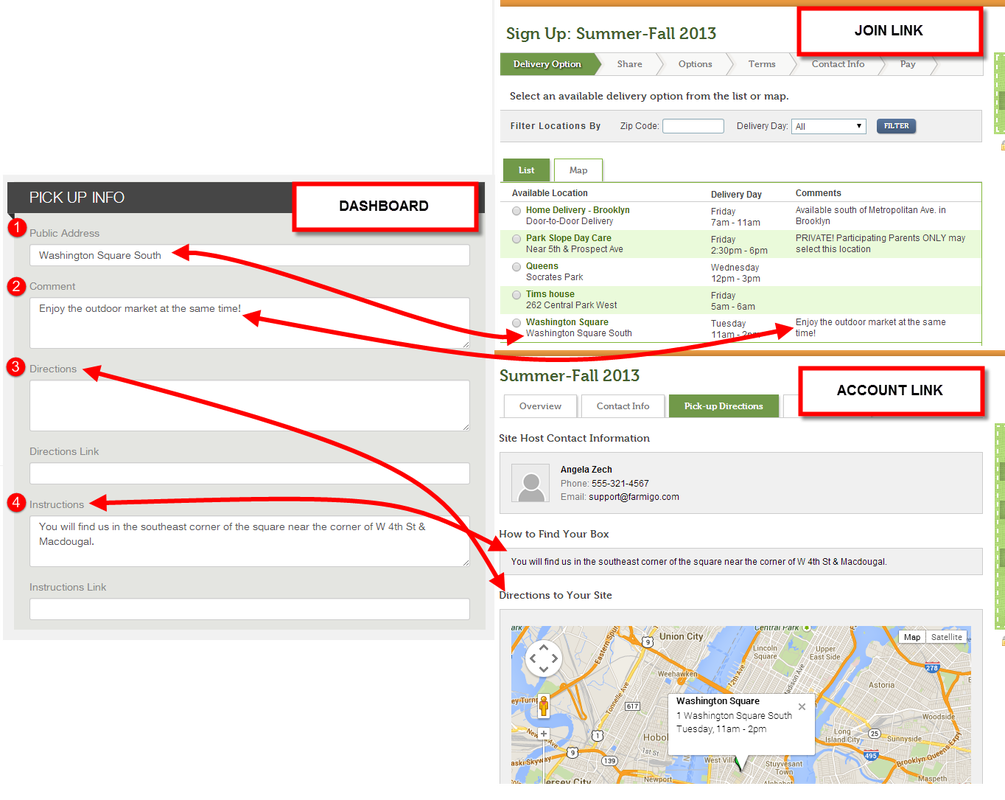
Click on the image below to see how the information in the location page becomes a new location choice during the sign-up process.
Below we will explain the different fields under the General header.
1. *Title - This will be seen by members when they select their location in the signup process. It is the main field by which a location is identified.
2. *Route - The delivery day assigned to a location is based on the Route to which it is assigned. Click here to learn about Routes. If order for members to see a location, the location cannot be Unassigned.
3. Hours - This field will indicate to your members when they may pick up their order at that location or expect to receive their delivery.
4. *Capacity - Enter the maximum number of people who can pick up at this location. If you are not concerned with capacity, enter a really high number. You may frequently check a locations current capacity using the Demand Breakdown report. If you are managing a Delivery Zone, please note that the capacity will not be strictly enforced but you will want to enter a capacity of at least 10 to ensure that multiple members may select that option when signing up.
5. *Street, City, State, Zip - This is the physical address of the location. The Street address will be displayed in the signup process unless something is entered in the Public Address field (see below). These fields are required. You will need to enter a street address that is valid in Google Maps.
6. Type - Select "Regular" if this location will act as a pickup site where a group of members will go to pick up their orders. Select "Zone" if you are setting up a home delivery zone (click here to learn more about how to home delivery works).
7. Waitlist - If Enabled, the location will turn into a waitlisted location when the location's capacity is met. Members can only sign up for a waitlisted location if they sign-up for another available location. (Click here to learn more about waitlists.)
HOSTS
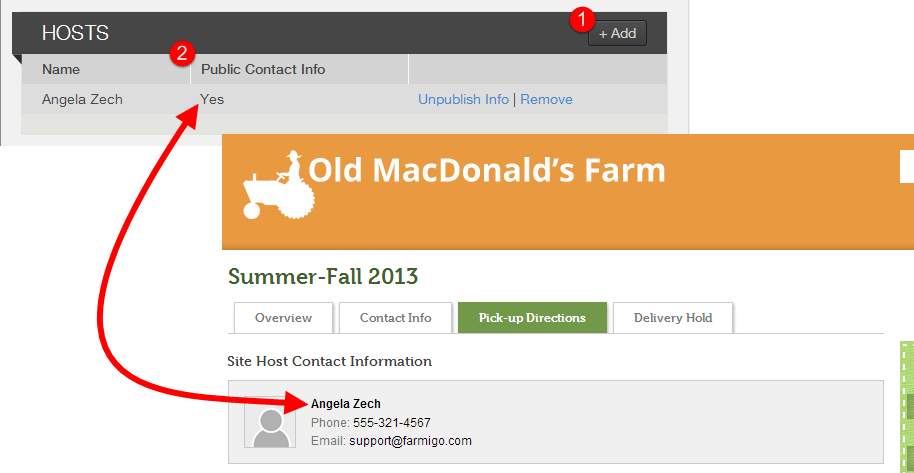
1. + Add - Click this button to add a host. You will be able to look up the host by name or email address. A host will need to have a member account in order to assign them to a location. Click here to learn more about location hosts.
2. Public Contact Info - If this is set to Yes, members assigned to that location will be able to see the hosts contact information when they log into their account.
2. Public Contact Info - If this is set to Yes, members assigned to that location will be able to see the hosts contact information when they log into their account.
PICK UP INFO
1. Public Address - If this field is left blank, the street address is displayed by default in the first step of the member signup process. If something is entered here, the street address is hidden from the signup process and replaced by the text entered here. When a public address is used, the following information is sent to Google to locate the pin on the sign-up wizard: <Public Address> <City> <State>
*If the public address is not a place recognized by Google Maps, this may effect the location of the pin. We recommend that you use nearby cross-streets as your public address.
2. Comment - These notes will be seen by the public in the first step of the sign-up process. e.g. "For employees only" or "A 2% per delivery fee will be applied".
3. Directions - Only members who sign up for the location will see these directions when they log into their account. This is a good place to enter driving directions for this location. 500 character maximum; if you need to enter more information, create a page on your website and insert the URL in the Directions Link field.
4. Instructions - Only members who sign up for the location will see these instructions when they log into their account. This is a good place to enter pickup instructions. For example: "Boxes are in the back cooler. Please sign the pickup form at the front counter when you pick up your share." 500 character maximum; if you need to enter more information, create a page on your website and insert the URL in the Instructions Link field.
EXTRA FEES
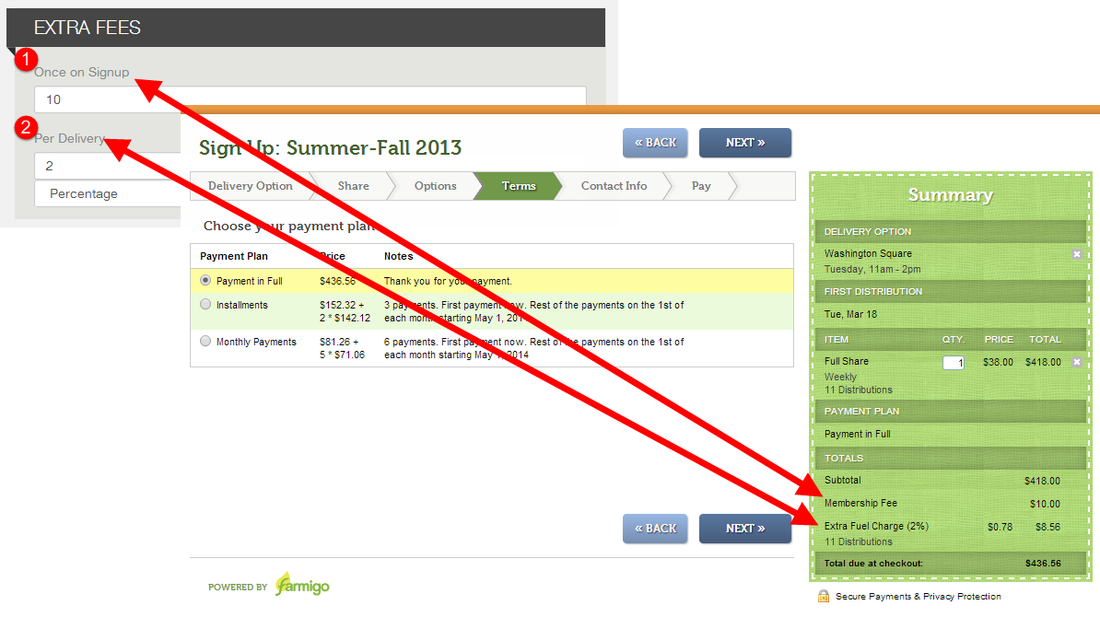
1. Membership Fee - This fee is charged to the member once at the time that they sign up. This fee will be listed under the Payment section of the member's account.
2. Per Delivery Fee - This fee is charged each time that the member receives a delivery. It can be a Percentage (%) of the value of the member's subscription or a Fixed ($) dollar amount per delivery.
2. Per Delivery Fee - This fee is charged each time that the member receives a delivery. It can be a Percentage (%) of the value of the member's subscription or a Fixed ($) dollar amount per delivery.
- The Percentage fee only applies to a member's subscription and not their store order.
- When the fee is applied it is recorded under the member's History.
- You may change the label of the Fuel Cost fee by going to Settings --> General Page --> Customized Labels.
- Farmigo Credits cannot be used towards the delivery fee

