How do I manage a Subscription Waitlist?
|
Farmigo offers you the ability to keep track of members who are interested in subscriptions after they have sold out.
Read below to learn more about: |
LEARN MORE |
- How to waitlist a share
- How a member signs up for a waitlisted share
- How to add a member to a waitlisted share from the dashboard
- How to view your list of waitlisted members for a share
- How to transition a member off of the waitlist
- How a member signs up for a waitlisted share when all of your shares are full
- How a member signs up for a waitlisted share
- How to add a member to a waitlisted share from the dashboard
- How to view your list of waitlisted members for a share
- How to transition a member off of the waitlist
- How a member signs up for a waitlisted share when all of your shares are full
How do I set up a waitlist for a share or option?
To set up a waitlist for an individual share or option, the share or option must meet 2 conditions:
- The Capacity field for that share or option must be set to zero (0).
- The Status field for that share or option must be Published.
How does a member sign up for a share or option waitlist?
If a member wants to be added to the waitlist for a waitlisted share, they will:
As long as a member has selected a non-waitlisted share to receive, they may sign up for as many waitlisted options as they would like.
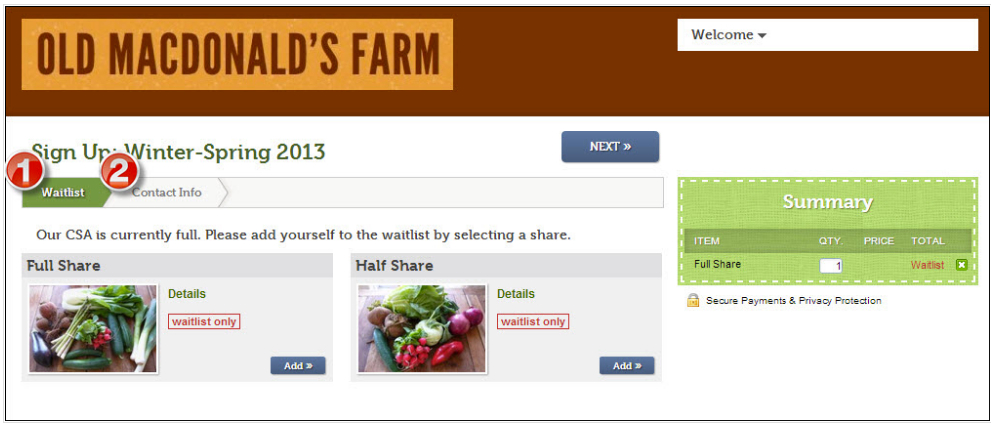
Here is the member view of a waitlisted share at sign-up:
- Select the waitlisted share that they would like to receive
- Select a non-waitlisted share to receive in the meantime in order to complete the sign-up process.
As long as a member has selected a non-waitlisted share to receive, they may sign up for as many waitlisted options as they would like.
Here is the member view of a waitlisted share at sign-up:
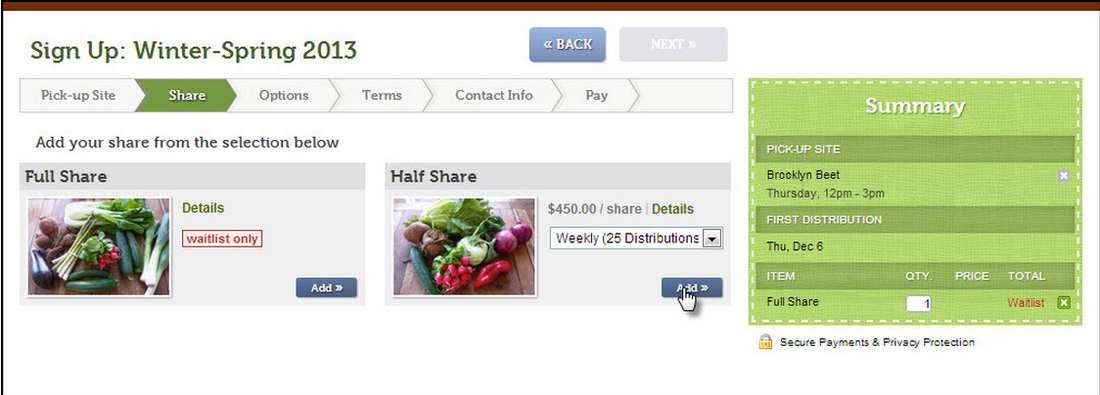
You may also add a waitlisted share or option to a member's current subscription from your administrative dashboard. To do this, you can take the following steps:
- Open the member's account
- If they do not already have an active subscription, create one by selecting a location and then adding a share and/or option that they can receive in the meantime
- Then you can add the waitlisted share: Click +Share, select the share, and when you click Add, select "To waitlist"
** If you would like the member to begin receiving this share immediately, you can select Add: As regular share

How to view your list of waitlisted members for a share
To view your list of waitlisted members for a share
- Click the Logistics icon on the left in your dashboard.
- Select Subscription Waitlists, under the Subscriptions section. You will see a table that shows you the share listed as well as the number of members on the waitlist.
- Click on the number of members and this will take you to the list.
- From here, you can open individual member accounts to edit their subscriptions or email all members on the waitlist.
How to transition a member from a waitlist share to an active share
- Ask the member and confirm that they want to receive that share or option which was previously waitlisted. Once they confirm, go on to step 2.
- Open the member's account.
- Delete the waitlisted share or option from the member's subscription.
- Add back the share or option to the member's subscription as a regular share or option.
- Save changes.
- Go to the Payments section of the member's file to make adjustments:
a. Adjust any pending payments to reflect the new amount owed.
b. If an additional payment is required, use the Charge button or send the member the pay link.
c. If a refund is required, click here to learn about how to manage refunds.
How a member signs up for a waitlisted share when all of your shares are full
When your business is no longer taking sign-ups, you may want to put all of your subscriptions on the waitlist. To do this, you should:
When a potential member wants to add themselves to your subscription waitlist, they will:
- Set the Capacity field for ALL shares to zero (0)
- Set the Status field for ALL shares to Published.
- Unpublish all of your options.
When a potential member wants to add themselves to your subscription waitlist, they will:
- Select their preferred share.
- Set up an account by entering their contact information.
- Receive the Automated Email for "Wait List Signup Confirmation".