
Understanding a Member Account Page
On this page, we will cover the following areas:
- Edit Mode
- Top of the screen navigation
- Canceling a subscription
- Subscription Tab (including Details, Payments, History and Email section)
- Contact Info Tab
Edit Mode
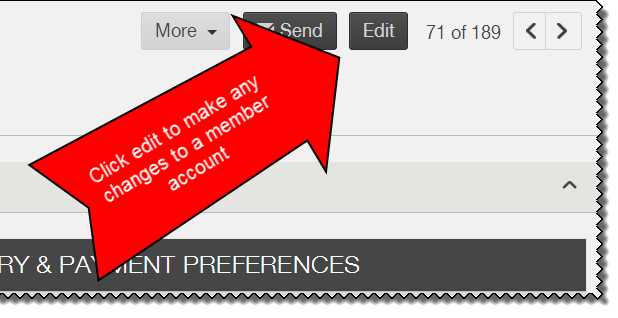
To edit a member account, click the edit button in the upper right hand corner.
Below we will walk through each aspect of a member account.
Below we will walk through each aspect of a member account.
Top Navigation
At the top of every member account, you will find the following information and buttons:

1. Member Name
2. Member balance:
- Seasonal Systems: This is the balance due. A positive balance means the member has overpaid or you owe them money. A negative balance means the member owes you money. A $0 balance means the member is in good standing.
- Ongoing Systems: This is the balance on account. A negative balance means the member owes you money. If the member has a positive balance, their delivery will debit from this balance.
3. Credits: This is the amount of Farmigo Credits on a member's account. Farmigo credits are a currency that can only be used in the webstore. You will only see Farmigo Credits if they are enabled in your system. To read more about Farmigo Credits, click here.
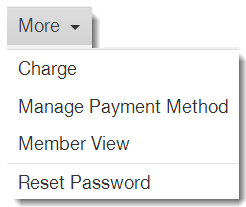
4. More
- Charge: Charge a member one time.
- Manage Payment Method: Update payment details for electronic checks or credit cards.
- Member View: View a member's account from their perspective.
- Reset Password: Trigger a reset password email to a member
5. Send: Email an individual member
6. Edit: Enter edit mode to update or edit any information in a member's account.
7. Arrows: Navigate quickly between member accounts without having to return to your list of members.
6. Edit: Enter edit mode to update or edit any information in a member's account.
7. Arrows: Navigate quickly between member accounts without having to return to your list of members.
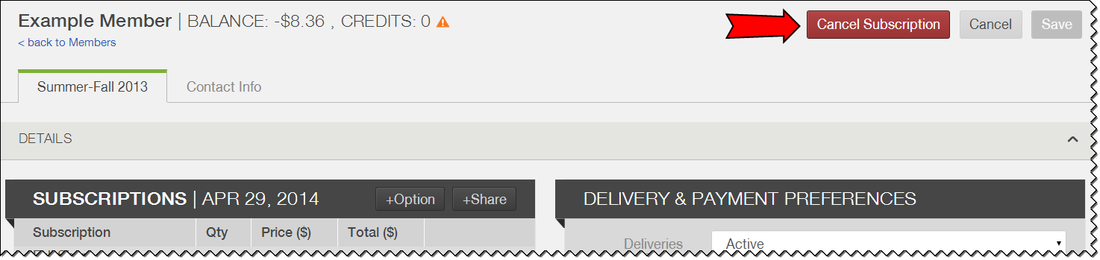
Canceling a Subscription
To cancel a member's subscription, click Edit in the upper right corner. After clicking edit, you will see and you can click the Cancel Subscription button. Three options will appear:
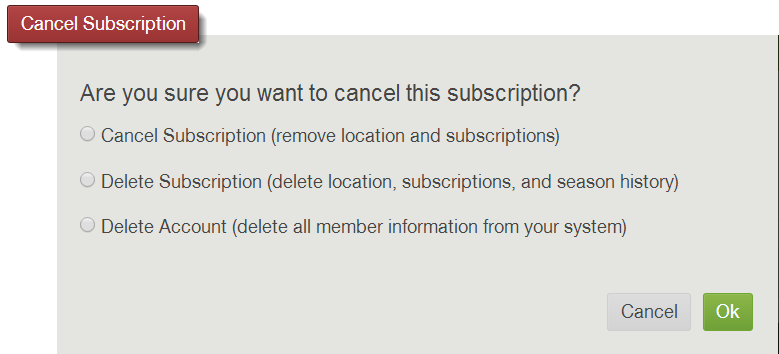
1. Cancel Subscription
2. Delete Subscription
This option should be used rarely. It is NOT recommended to use this button if you need to cancel a member's subscription.
3. Delete Account
- The member's location, subscriptions, and automatic payment token are removed
- Please note: Adding a pickup site and a subscription will reactivate the member's account!
- Please note: The member cannot re-join by using the sign up wizard. The admin must re-activate the subscription by adding a pickup site and share.
- Anything listed under the Order header is deleted.
- All of the information in the Payment, History, Contact, and Notes (including comments and flags) is retained.
- Any Automatic Payment Token (blue circular arrows symbol) on the member's account is removed.
2. Delete Subscription
This option should be used rarely. It is NOT recommended to use this button if you need to cancel a member's subscription.
- Deletes all of the member's subscription history, including information in the Payment and History.
- Information in the Contact and Notes (including comments and flags) is retained. Members' passwords will remain in the system if they decide to subscribe again in the future.
- Members can re-join by using the sign-up wizard. They should sign in using the email address and password they used when they originally joined.
- Deletes the Automatic Payment Token (blue circular arrows symbol) on the member's account.
3. Delete Account
- Deletes a member’s entire account from your system. The Member Account will not exist after you delete it.
- Members can re-join by using the sign-up wizard. They will need to register and create an account as if they are a new member.
Subscription Tab
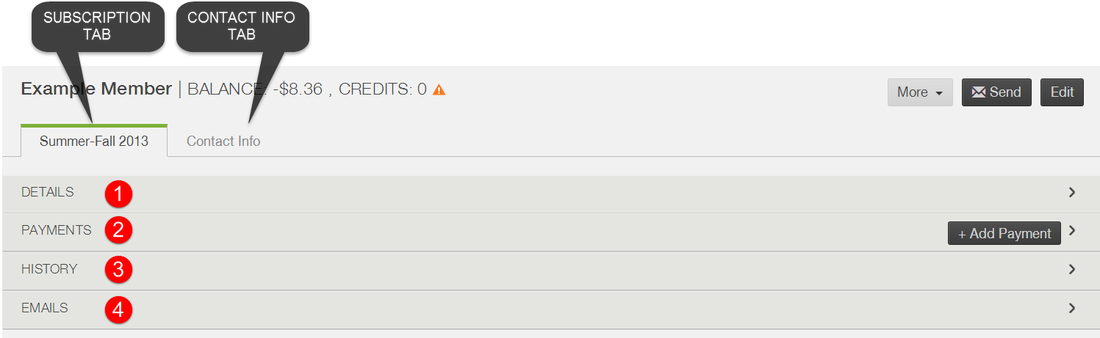
In every member account, there is a Subscription Tab and a Contact Info Tab. Within the subscription tab there are four header sections:
1. Details
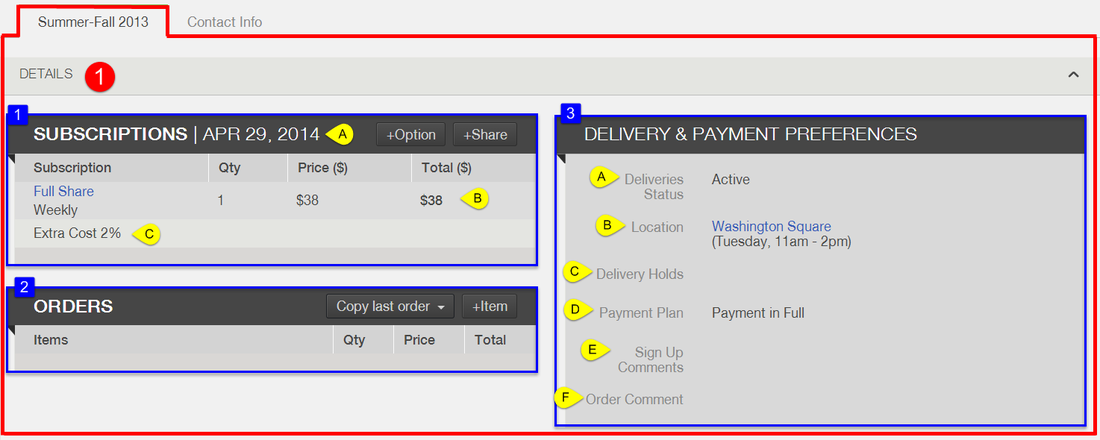
1. Subscriptions
A. Upcoming delivery date: This is the date a member will receive their next share/option delivery.
B. Shares and Options: These are the shares and options assigned to a member's account
C. Extra Cost: This is the extra cost associated with the member's pickup/delivery location. They will be charged this amount each time they receive a delivery.
2. Orders
This is where you can view and edit a member's store order. To read more about store orders, click here.
3. Delivery & Payment Preferences
A. Deliveries Status:
B. Location: This is the location the member is currently receiving deliveries.
C. Delivery Holds: This is where you can edit or set a temporary hold for a member. If you allow, a member can also put their own account on hold through the account link.
D. Payment Plan: This is the current payment plan assigned to the member's account. This payment plan can be changed by selecting More --> Manage Payment Method.
E. Sign Up Comments: If a member enters comments during the sign-up process, they will show up here. To learn more about sign-up comments, click here.
F. Order comment: If a member enters comments at checkout from the webstore, they will show up here. To learn more about order comments, click here.
A. Upcoming delivery date: This is the date a member will receive their next share/option delivery.
B. Shares and Options: These are the shares and options assigned to a member's account
C. Extra Cost: This is the extra cost associated with the member's pickup/delivery location. They will be charged this amount each time they receive a delivery.
2. Orders
This is where you can view and edit a member's store order. To read more about store orders, click here.
3. Delivery & Payment Preferences
A. Deliveries Status:
- Active: The member is currently scheduled to receive deliveries
- Permanent Hold: The member is not scheduled to receive deliveries. Their account will not become active unless you change the status to Active.
B. Location: This is the location the member is currently receiving deliveries.
C. Delivery Holds: This is where you can edit or set a temporary hold for a member. If you allow, a member can also put their own account on hold through the account link.
D. Payment Plan: This is the current payment plan assigned to the member's account. This payment plan can be changed by selecting More --> Manage Payment Method.
E. Sign Up Comments: If a member enters comments during the sign-up process, they will show up here. To learn more about sign-up comments, click here.
F. Order comment: If a member enters comments at checkout from the webstore, they will show up here. To learn more about order comments, click here.
2. Payments
Review and edit a member's payments. To learn more, click here, or choose your question below:
3. History
The History Header is basically a balance sheet. When a member makes a payment you will see a credit. When a member receives a delivery, you will see a debit.
Farmigo's monthly service fee is based off of the value of the deliveries that are debited. You can see your service fee in the Past Deliveries ($) Report.
Farmigo's monthly service fee is based off of the value of the deliveries that are debited. You can see your service fee in the Past Deliveries ($) Report.
4. Emails
The Emails Header will show you all emails that have been sent to the member through the Farmigo System. If you click on the email, you will be able to see how all dynamic fields were filled in. This can be very helpful when testing email alerts and templates.
Contact Info tab
You can view and edit member information in the Contact Info Tab of the member file:

1. Member
The member section contains a member's contact information including First Name; Last Name; Email; Primary Phone Number; Secondary Phone Number.
Emailing and calling members from the contact info tab:
- Click on a member's email address to automatically open your device's email editor.
- Click on a member's primary or secondary phone number on a cell phone in order to begin a call to the member.
Setting email settings:
- The check-box for "Receive Automatic Email Alerts" controls whether or not a member receives automatic email alerts. Members also have the power to select or deselect this option from their account view.
2. Partner
The Partner section allows you to have a secondary contact for the member account. The check-box for "Receive Email Communication" will include the secondary contact on all mail that gets sent to the primary contact.
Note that an account partner will not have a unique password or login ID.
3. Address
Enter a member's address. If you do home delivery, this is the address that will be used to set a member's home delivery location.
4. Notes and Flags
Notes:
The notes section is used as an administrative tool within the dashboard. Unlike the Sign-up Comments, Notes are never exported reports. They are only visable by system Admins. Notes are often used in combination with Flags to manage special issues.
Flags:
Flags are used to group members into subset groups or to call attention to a specific member. You can use the filters to find and email members with specific flags. For example, admins often use flags to identify members who:
- Volunteer
- Have a special payment plan
- Need to have their account updated